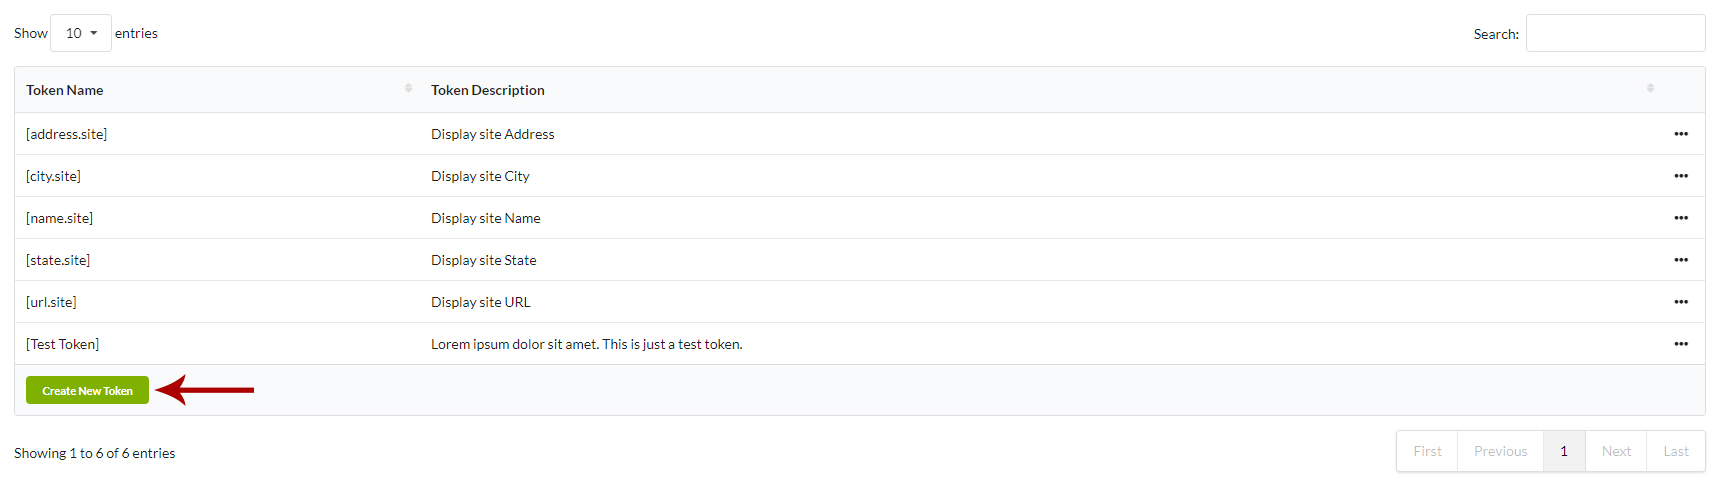
Along with the set of default tokens, the MainWP Boilerplate Extension allows you to create your custom tokens.
Create Custom Tokens
- Login in to your MainWP Dashboard
- Go to the MainWP > Extensions > Boilerplate > Custom Tokens page
- Click the Create Custom Token button
- Modal will show
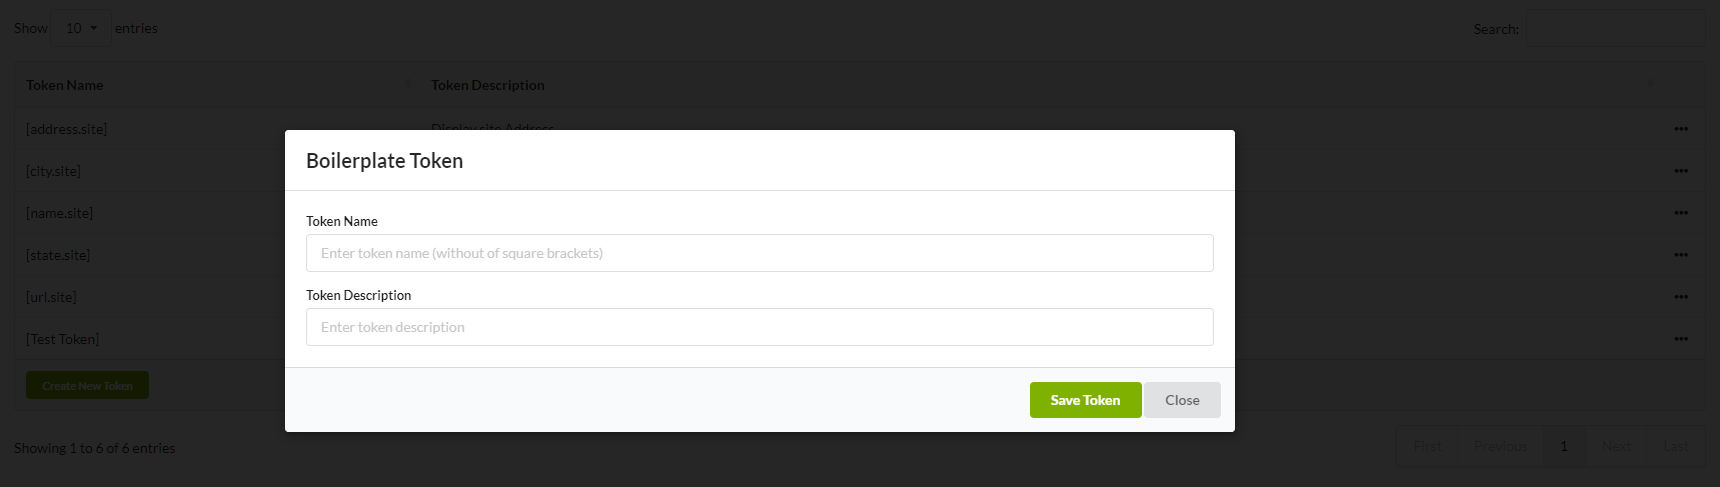
- Add Token Name
- Add Token Description
- Click the Save button
After saving the new token, the token will appear in the Tokens table. From here, you can Edit or Delete it.
Also, from this moment, the token will be added to the Boilerplate Settings option box on the child site edit page, where you can set values for the token.
When creating a new token, do not use [ ] symbols. The Boilerplate extension will add it automatically.
Avoid creating tokens that our reserved for our Clients functionality and Pro Reports extension: [client.city] [client.contact.address.1] [client.contact.address.2] [client.contact.name] [client.email] [client.name] [client.phone] [client.site.name] [client.site.url] [client.state] [client.zip] [client.facebook] [client.twitter] [client.instagram] [client.linkedin] [client.country] [client.note] [client.created] [client.contact.name] [contact.role] [contact.email] [contact.phone] [contact.facebook] [contact.twitter] [contact.instagram] [contact.linkedin]
Avoid creating tokens that our reserved for our Clients functionality and Pro Reports extension: [client.city] [client.contact.address.1] [client.contact.address.2] [client.contact.name] [client.email] [client.name] [client.phone] [client.site.name] [client.site.url] [client.state] [client.zip] [client.facebook] [client.twitter] [client.instagram] [client.linkedin] [client.country] [client.note] [client.created] [client.contact.name] [contact.role] [contact.email] [contact.phone] [contact.facebook] [contact.twitter] [contact.instagram] [contact.linkedin]
Set Values for Custom Tokens
- Login in to your MainWP Dashboard
- Go to the MainWP > Sites > Manage page
- Locate one site and click the Edit action
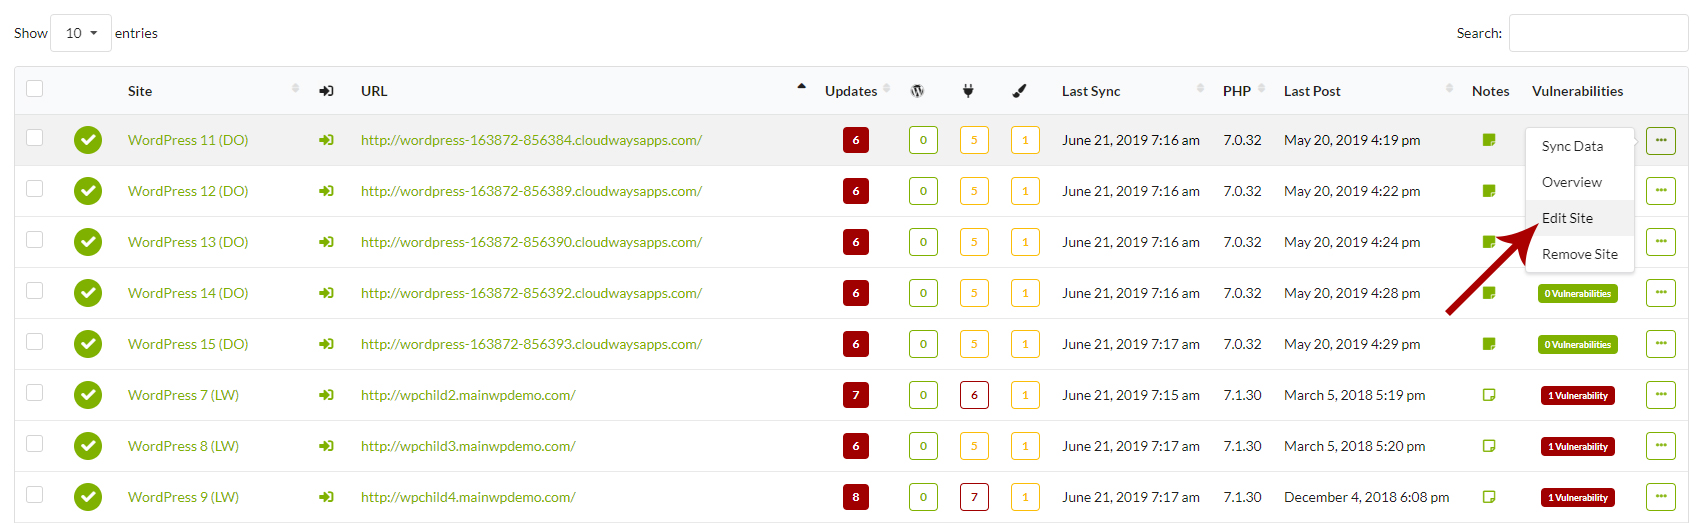
- Locate the Boilerplate Settings option box
- Enter values for tokens that you intend to use
- Click the Update Site button
- Repeat steps 3 – 6 for the rest of your child sites