The MainWP Pro Reports Extension combines the power of the free MainWP Child Reports plugin with a fully customizable reporting engine that allows you to create the type of report you are proud to send to your clients.
The MainWP Child Reports plugin, installed on your Child Sites, will track and monitor every change made on your child site, and then the Pro Reports Extension on your Dashboard will gather that information and convert it to a PDF Report you can show your clients.
- Generate professional reports in seconds
- Pre-made professional templates to get you started
- Send PDF reports automatically attached to the email
- Quickly include/exclude certain content from reports
- Highly customizable templates system
- Set custom branding for reports

Setting up the Pro Reports Extension
Installation
-
- Install the MainWP Child Reports plugin on all your child sites. It is available for free on wordpress.org. Once the plugin is installed, it will start recording logging events that you will be able to include in the reports.
NOTE: MainWP Child Reports plugin keeps records for 100 days. Click here to see where to change this value. - Install the MainWP Pro Reports Extension on your MainWP Dashboard
- Sync your site (it’s important to sync your sites so your Dashboard can pick up all the sites that have the MainWP Child Reports plugin installed)
- Install the MainWP Child Reports plugin on all your child sites. It is available for free on wordpress.org. Once the plugin is installed, it will start recording logging events that you will be able to include in the reports.
If you are a new user and you haven’t had the MainWP Child Reports plugin installed on your sites, you may need to wait for a couple of days before the MainWP Child Reports records some activity.
Client information
To save time, Pro Reports extension, by default, uses tokens for certain information such as Contact email and Name. This way, you don’t have to create a separate report for each individual child site or a client.
The primary way to enter the Client information is using our Clients feature. Using it, you have to define client information once, and then assign any number of child sites to a client.
You can find more information about how to do so in our help article and you can see a demonstration in the video at the top of this page.
Alternatively, you can set this information per-site, instead of per-client. Entering information per-site can be more time-consuming, but it offers further flexibility.
NOTE: If the same token (e.g. [client.email]) is defined both on the Client page and the Individual Site Edit page, the value on the Individual Site Edit page takes priority.
To enter per-site client information:
-
- Go to the MainWP Dashboard > Sites > Manage Sites page
- Locate the desired site and click the Edit action to edit site settings
- On the Edit page for the site, locate the Pro Reports Tokens section
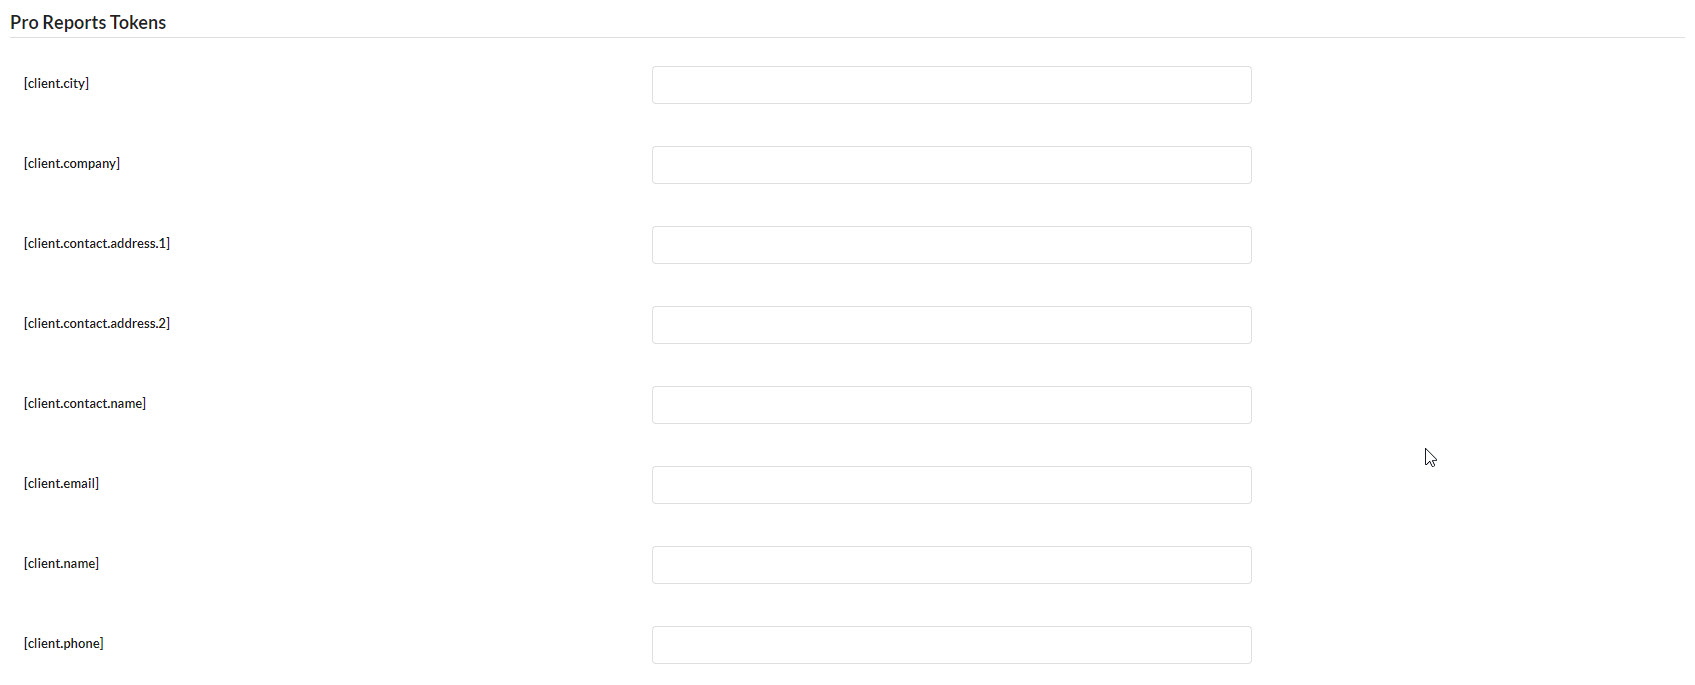
- By default, Pro Report uses [client.email] and [client.name] tokens for Send email to fields, so if you intend to use those tokens in the report, set their values in either the Client feature or on this page.
- Enter the rest of desired token values
- Click the Save Settings button
Create a recurring report
-
- Go to the MainWP Dashboard > Extensions > Pro Reports and go to the Create Report tab
- In the Report Settings section
- Enter the Report title
- In the Report type dropdown, choose Recurring
- In the Schedule dropdown select the frequency of the report: Daily, Weekly, Monthly
- If you’ve chosen Weekly or Monthly, another dropdown Send report on will be available to choose on which day of the week or month the report should be sent
- In the Report PDF file name you can optionally enter a custom filename for the PDF file that will be attached in the email
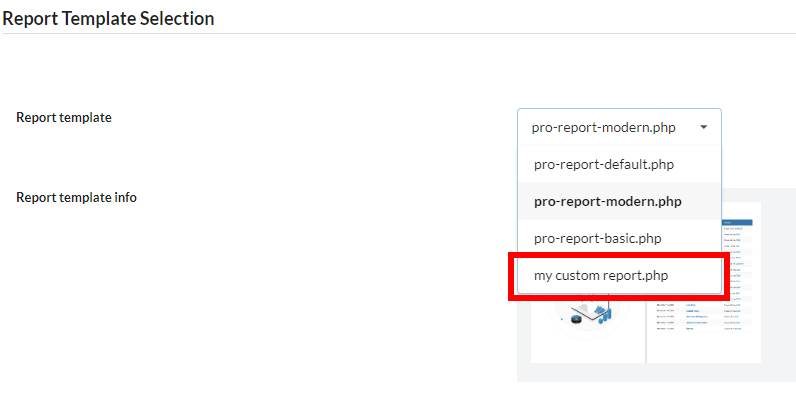
- In the Report Template Selection section, select a template for your report.
- In the Report Content & Design Customization section, we have three tabs: Custom Content, Report Data and Custom Branding
-
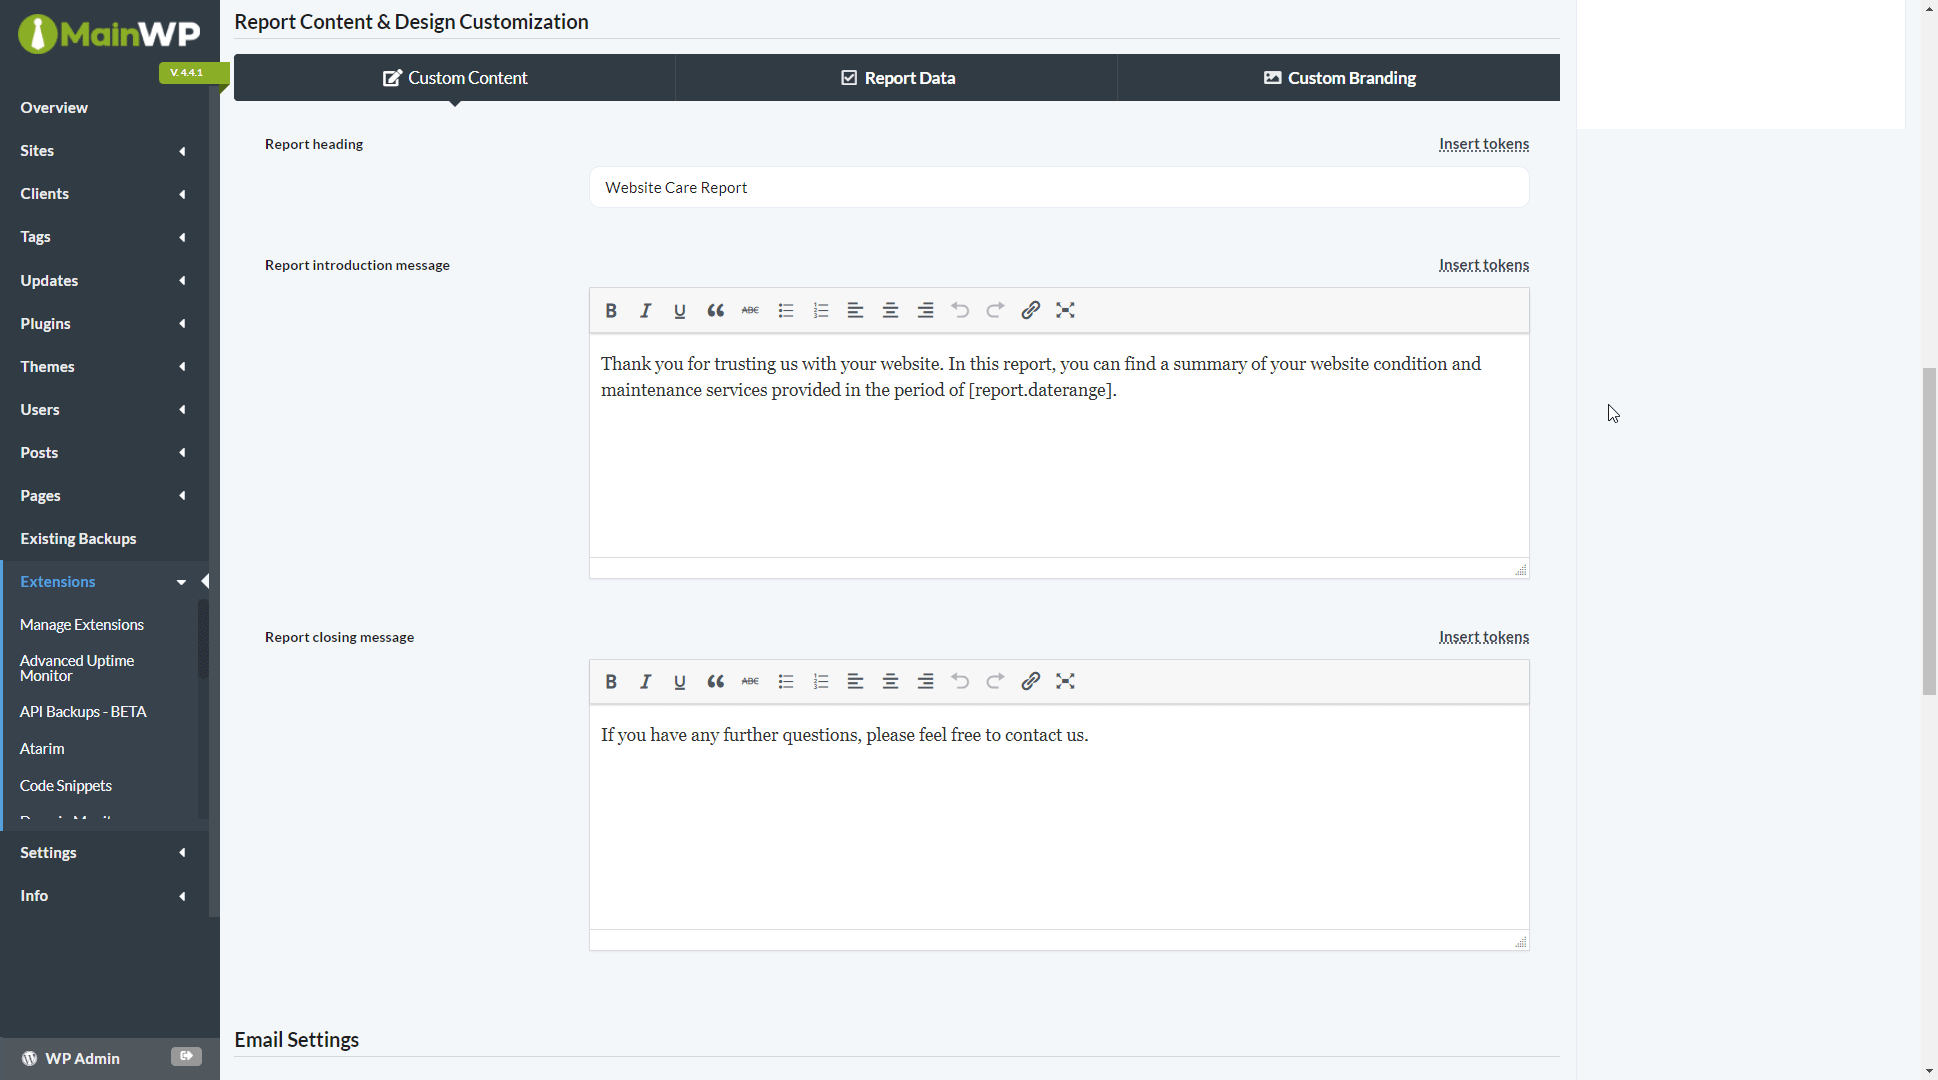
- On the Custom Content tab, you can customize the Report heading and Report introduction and Report closing message. These fields support tokens. Click on Insert Tokens to see which ones are available. This information will be part of the PDF file itself.
- On the Report Data tab, you can choose which sections should be included in the report. The number of available options will depend on the extension you have installed on your MainWP Dashboard. The default selection for these Data sections is Hide if empty, which means that the section will be omitted if no activity occurred for it during the range of the report. So if there were no updates to WordPress Core, that section would not be present in the report. You can also always Show or always Hide any of these sections if you prefer.
- On the Custom Branding tab, you can upload your agency logo and header image for the first page of the PDF and customize the colors of the report to completely match your brand.
- In the Email Settings section,
- Enter the Send email from data (In most cases, your email address and name)
- Enter the Send email to data (In most cases, your client email address and name. Tokens are allowed here and can be left at their default values, [client.email] and [client.name] if they have been set on the Client page or in Site settings)
- Optionally, enter the Reply-to email and information
- Enter the Email subject (Tokens are allowed here)
- Enter the Email message (Tokens are allowed here)
- Select Email template which
- Optionally, enter the BCC email address
- Optionally, attach additional email attachments
- Select the wanted site(s) in the Metabox on the right
- You can preview the report as HTML in a popup modal or Download the PDF file for review
- If you do not wish to schedule the report now, you can click the Save Draft button to save all changes
- Once you are sure that the report is ready click the Schedule Report button

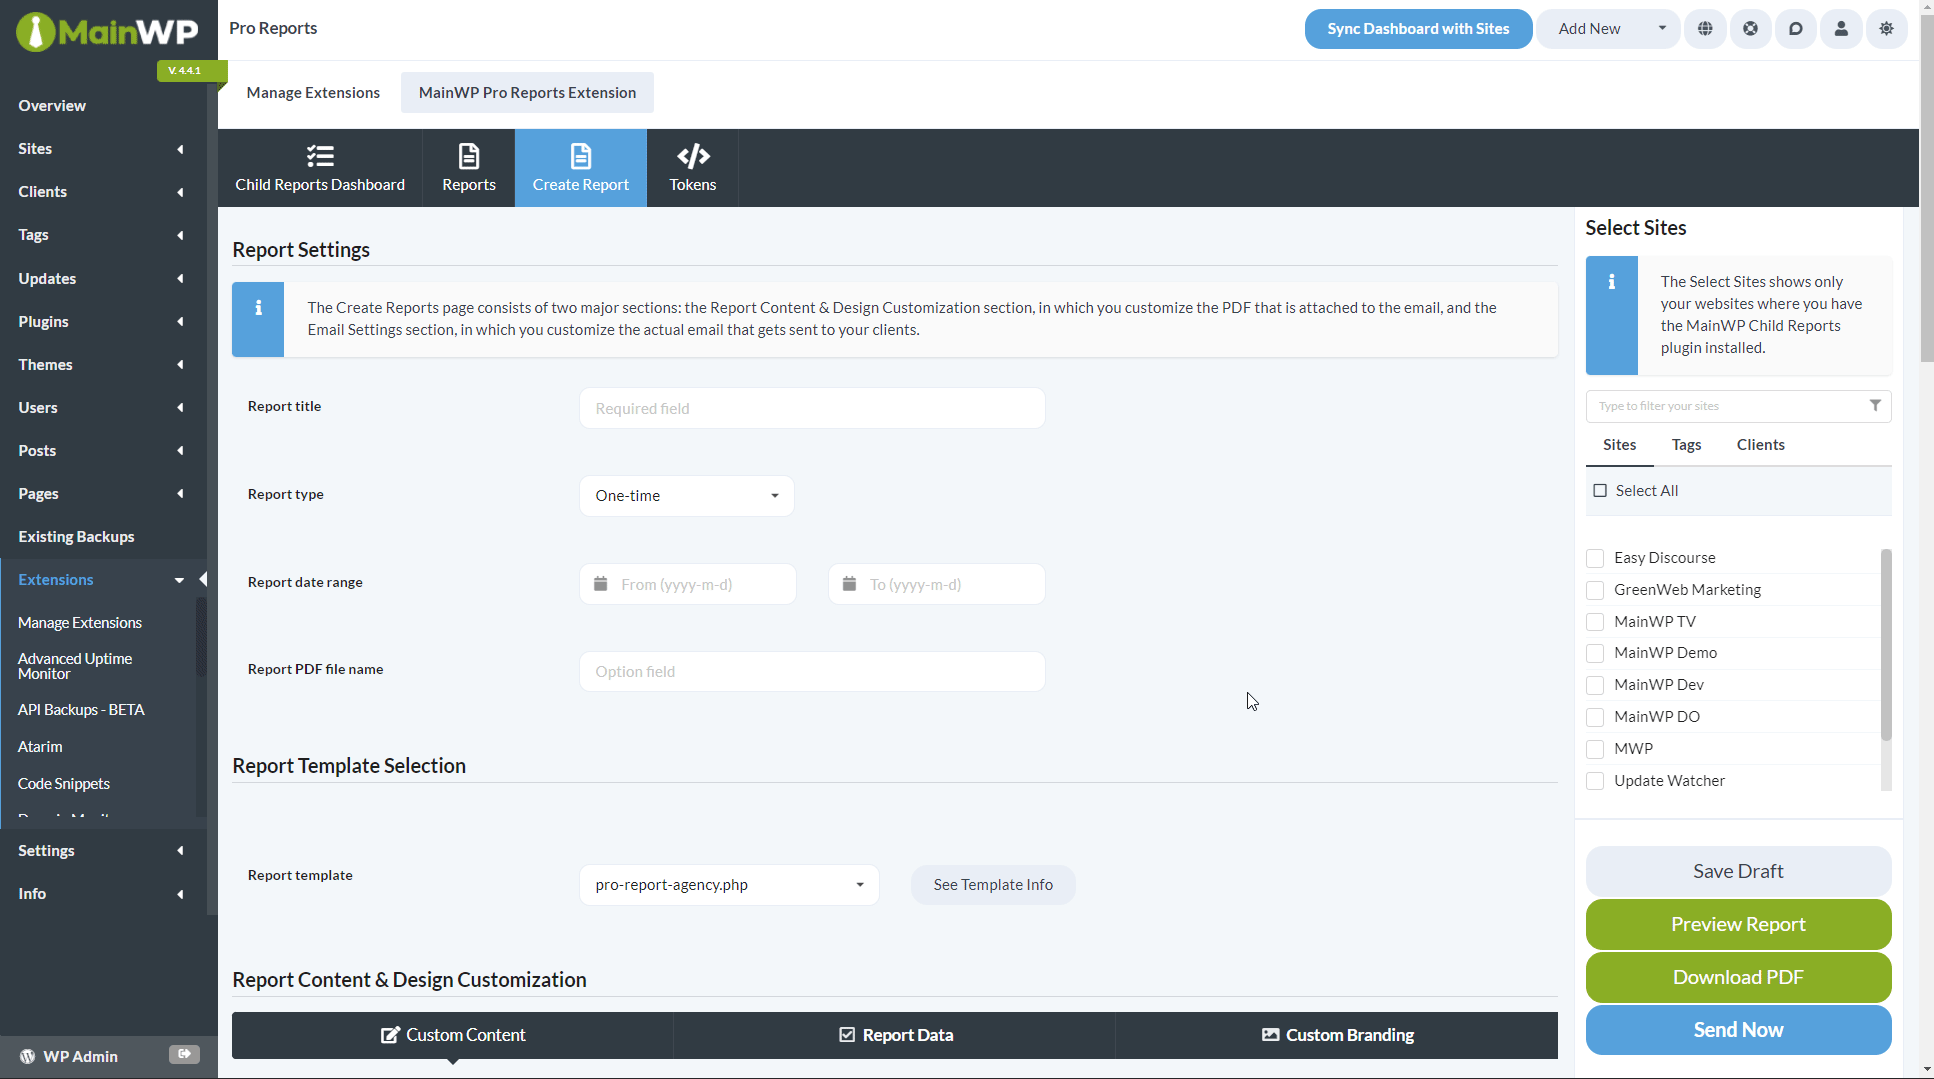
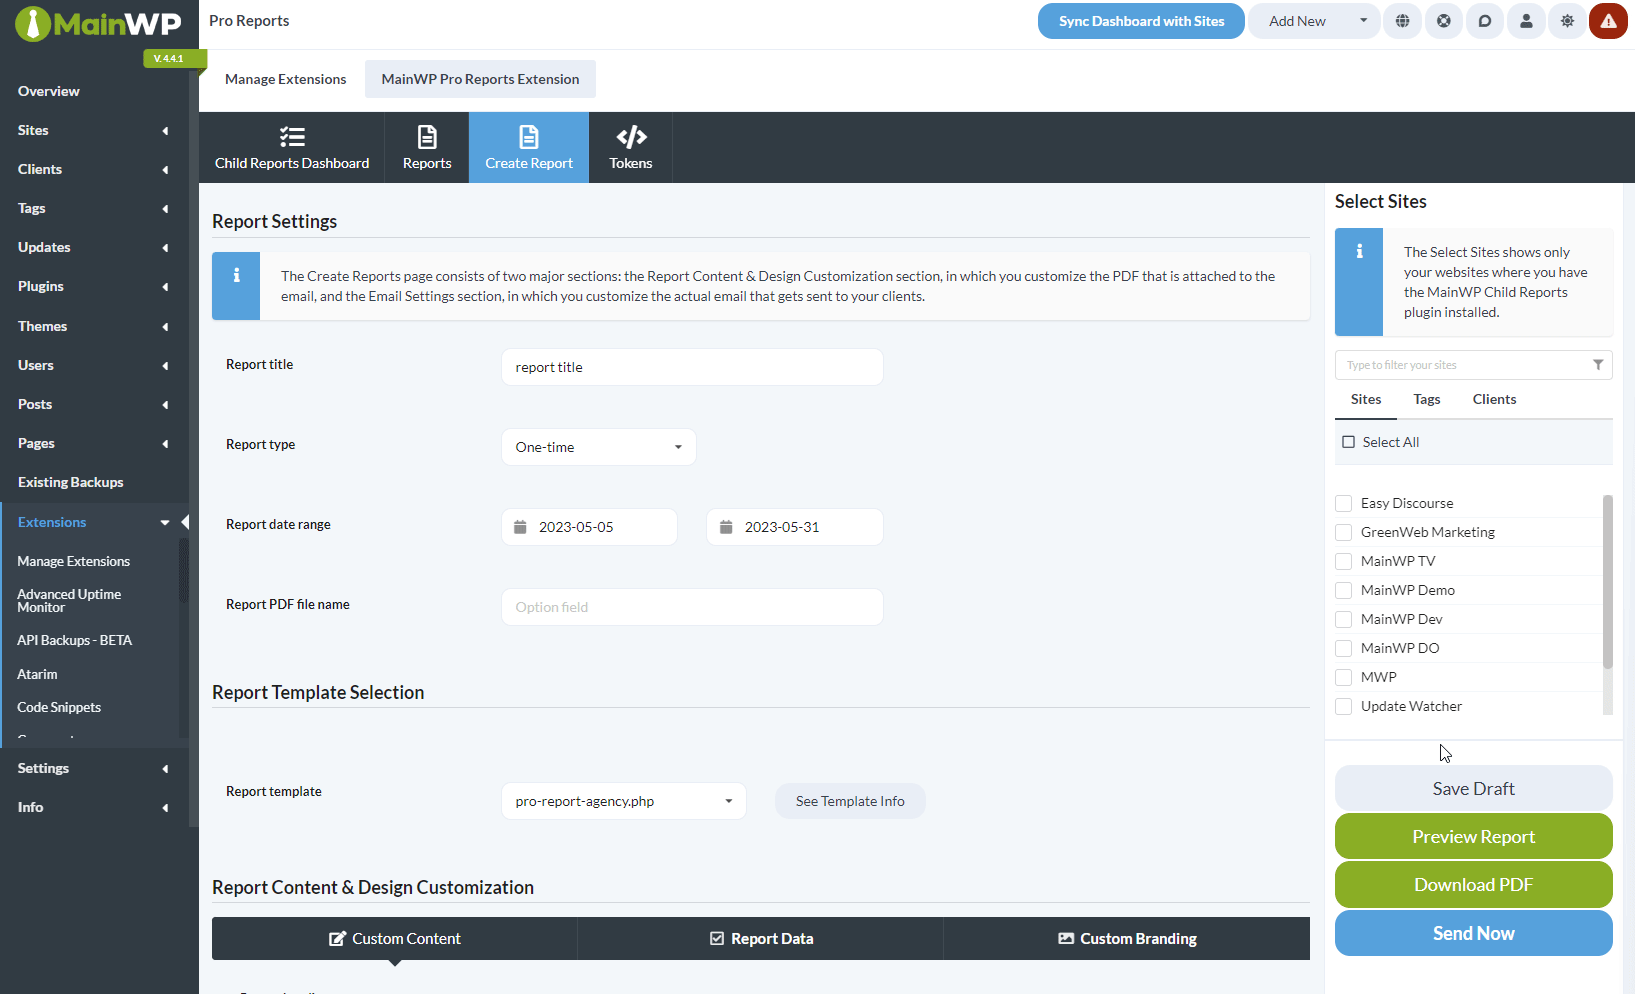
Create a one-time report
- Go to the MainWP Dashboard > Extensions > Pro Reports and go to the Create Report tab
- In the Report Settings section
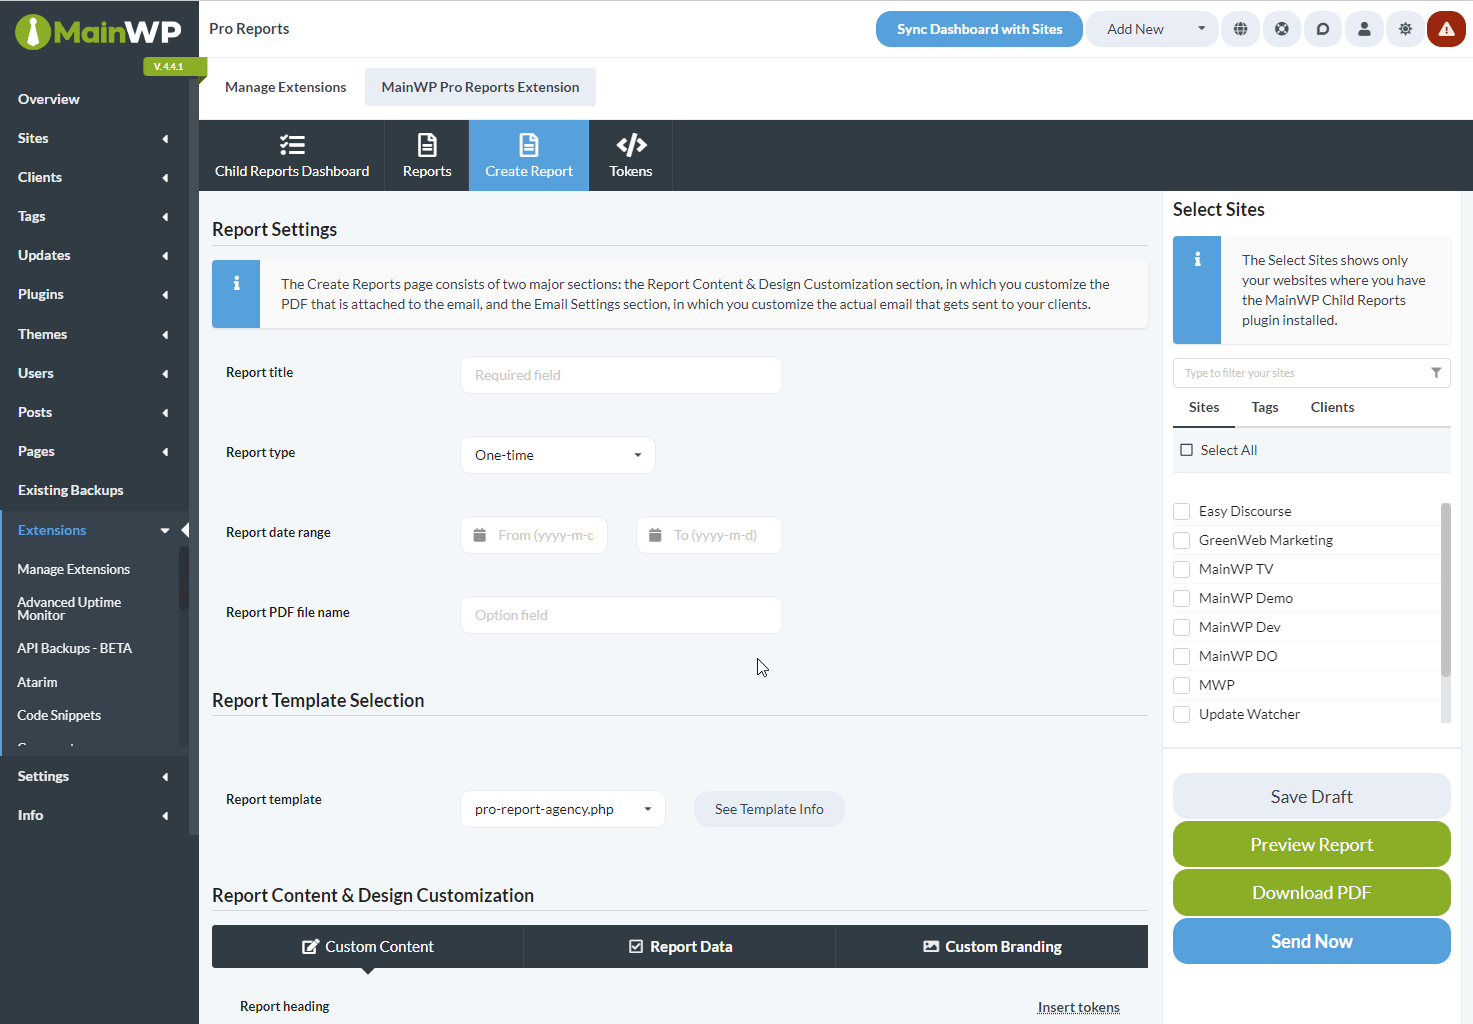
- Enter the Report title
- In the Report type dropdown, choose One-time
- In the Report date range, pick the starting and ending dates for the report
- In the Report PDF file name you can optionally enter a custom filename for the PDF file that will be attached in the email
- In the Report Template Selection section, select a template for your report.
- In the Report Content & Design Customization section, we have three tabs: Custom Content, Report Data and Custom Branding
- On the Custom Content tab, you can customize the Report heading and Report introduction and Report closing message. These fields support tokens. Click on Insert Tokens to see which ones are available. This information will be part of the PDF file itself.
- On the Report Data tab, you can choose which sections should be included in the report. The number of available options will depend on the extension you have installed on your MainWP Dashboard. The default selection for these Data sections is Hide if empty, which means that the section will be omitted if no activity occurred for it during the range of the report. So if there were no updates to WordPress Core, that section would not be present in the report. You can also always Show or always Hide any of these sections if you prefer.
- On the Custom Branding tab, you can upload your agency logo and header image for the first page of the PDF and customize the colors of the report to completely match your brand.
- In the Email Settings section,
- Enter the Send email from data (In most cases, your email address and name)
- Enter the Send email to data (in most cases, your client email address and name. Tokens are allowed here and can be left at their default values, [client.email] and [client.name] if they have been set on the Client page or in Site settings)
- Optionally, enter the Reply-to email and information
- Enter the Email subject (Tokens are allowed here)
- Enter the Email message (Tokens are allowed here)
- Select Email template which
- Optionally, enter the BCC email address
- Optionally, attach additional email attachments
- Select the wanted site(s) in the Metabox on the right
- You can preview the report as HTML in a popup modal or Download the PDF file for review
- If you do not wish to send the report now, you can click the Save Draft button to save all changes
- Once you are sure that the report is ready and want to send it, click the Send Now button
MainWP Pro Reports Extension Dashboard
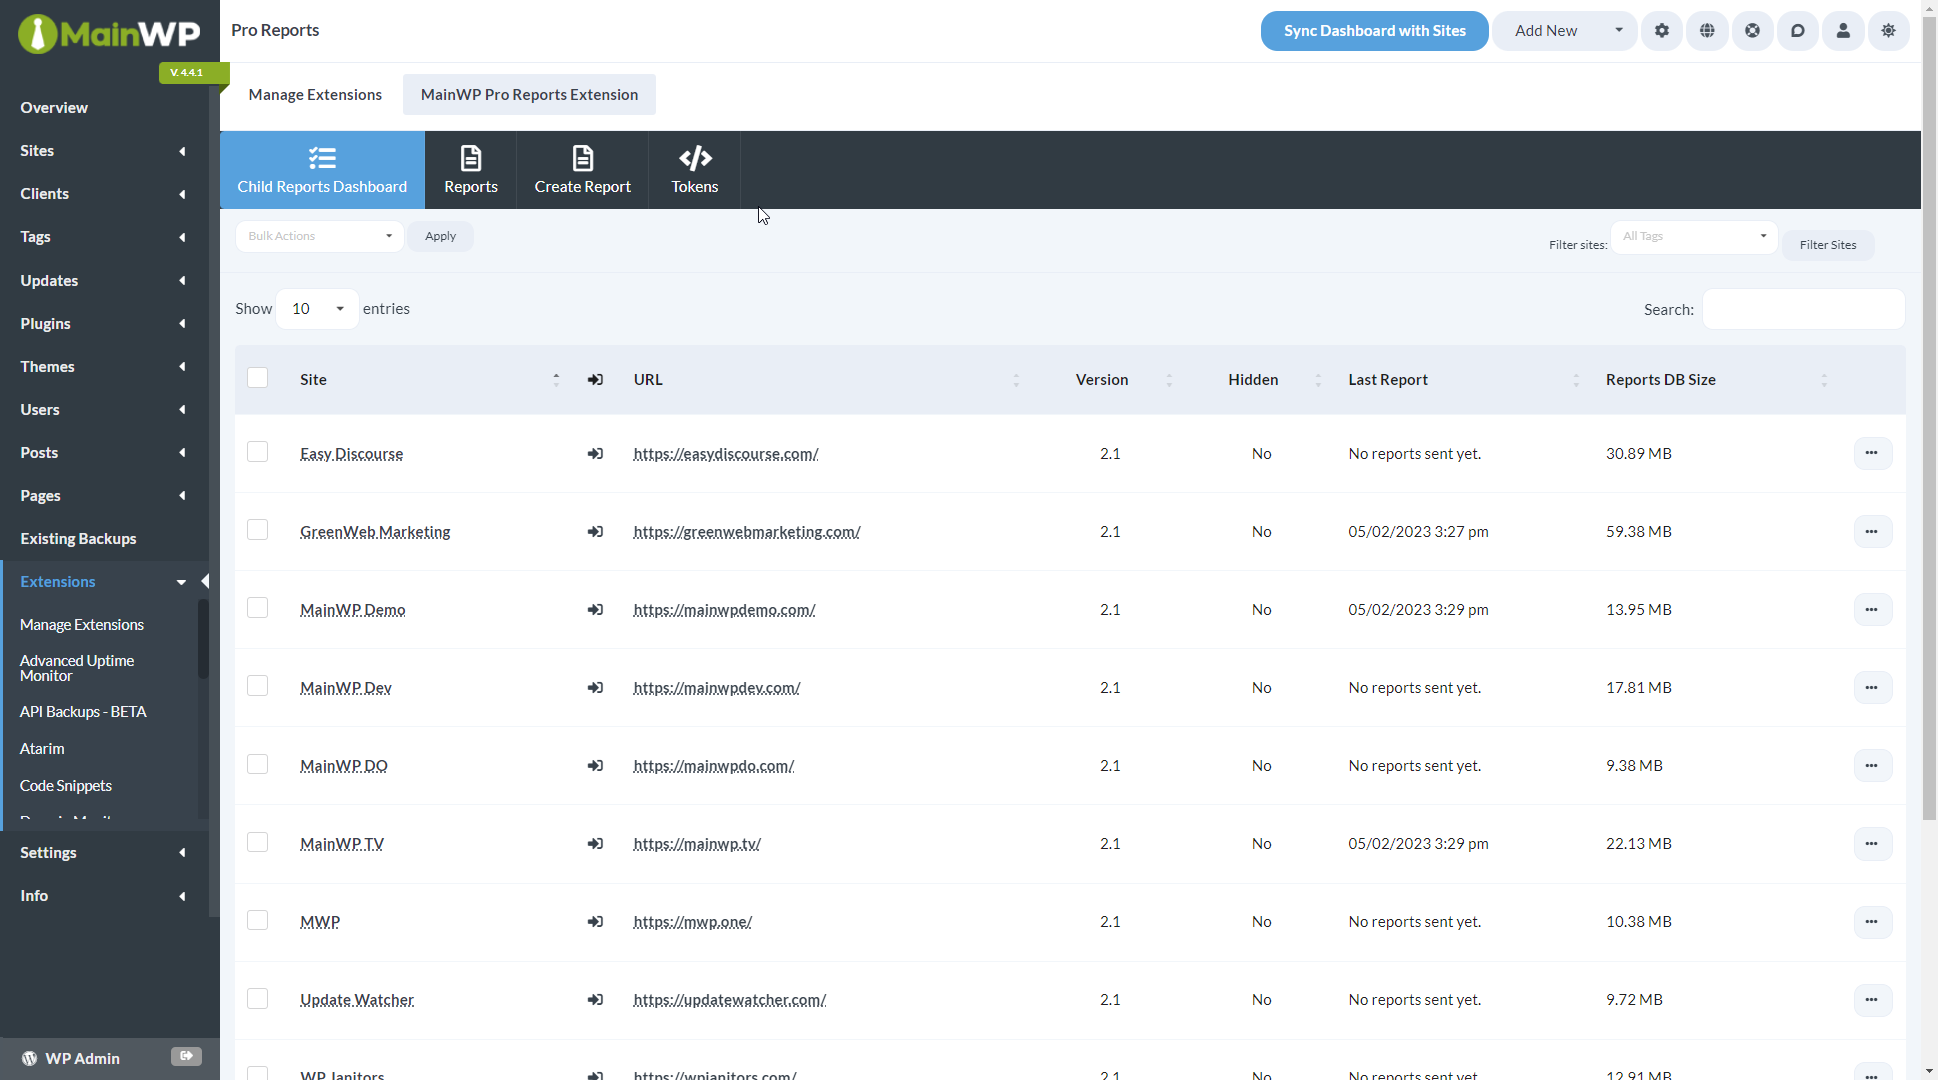
From the MainWP > Extensions > Pro Reports > Child Reports Dashboard page, you can monitor all of your child sites where you have the MainWP Child Reports plugin installed.
In the sites list, you will be notified if the plugin has an update available or if the plugin is deactivated.
- If the plugin is not activated, the plugin row will appear red, and the Activate action will appear in the actions menu.
- If there is a new version of the plugin, the plugin row will appear yellow, and the Update action will appear in the actions menu.
- If the plugin is not hidden at the moment, the Hide action will be available in the actions menu.
- If the plugin is hidden at the moment, the Unhide action will be available in the actions menu.
All these actions are also available in the bulk actions menu at the top of the page.
Additional information related to Pro Reports is available in the table:
- The column Version shows the version of the MainWP Child Reports plugin that’s installed on a child site.
- Last Report shows the last time when the Report was sent out for a child site.
- And Reports DB Size shows the size of a portion of the database related to Pro Reports.
Important Notes
If you know you have the plugin installed on a child site, but the child site doesn’t appear in the list, try to re-sync your sites.
Translate titles, subtitles, and table headings
Since version 4.1.1., Pro Reports extension allows you to easily translate and customize all titles, subtitles, and table headings in the report.
This feature, Custom Titles, is available in the Report Content & Design Customization section of the report settings page.

You can translate or customize any or all of the strings. The customized strings are saved per report, so you can have multiple report languages.
IMPORTANT NOTE: The actual values of certain data fields cannot be translated.
Those values or strings depend on the language of the plugins, themes or WP Core of the child sites themselves.
For example, in the Security section, you can translate any titles and subtitles to anything you want, but a security plugin may include an English sentence such as “No issues found” which is outside of the scope of this Pro Report feature.
MainWP Child Reports Plugin
The MainWP Child Reports plugin communicates changes collected on your Child sites to the MainWP Pro Reports Extension to create the reports. It has been designed to record certain actions performed on WordPress sites. It is available for free on wordpress.org.
Credit to the Stream Plugin, which the MainWP Child Reports plugin is built on.
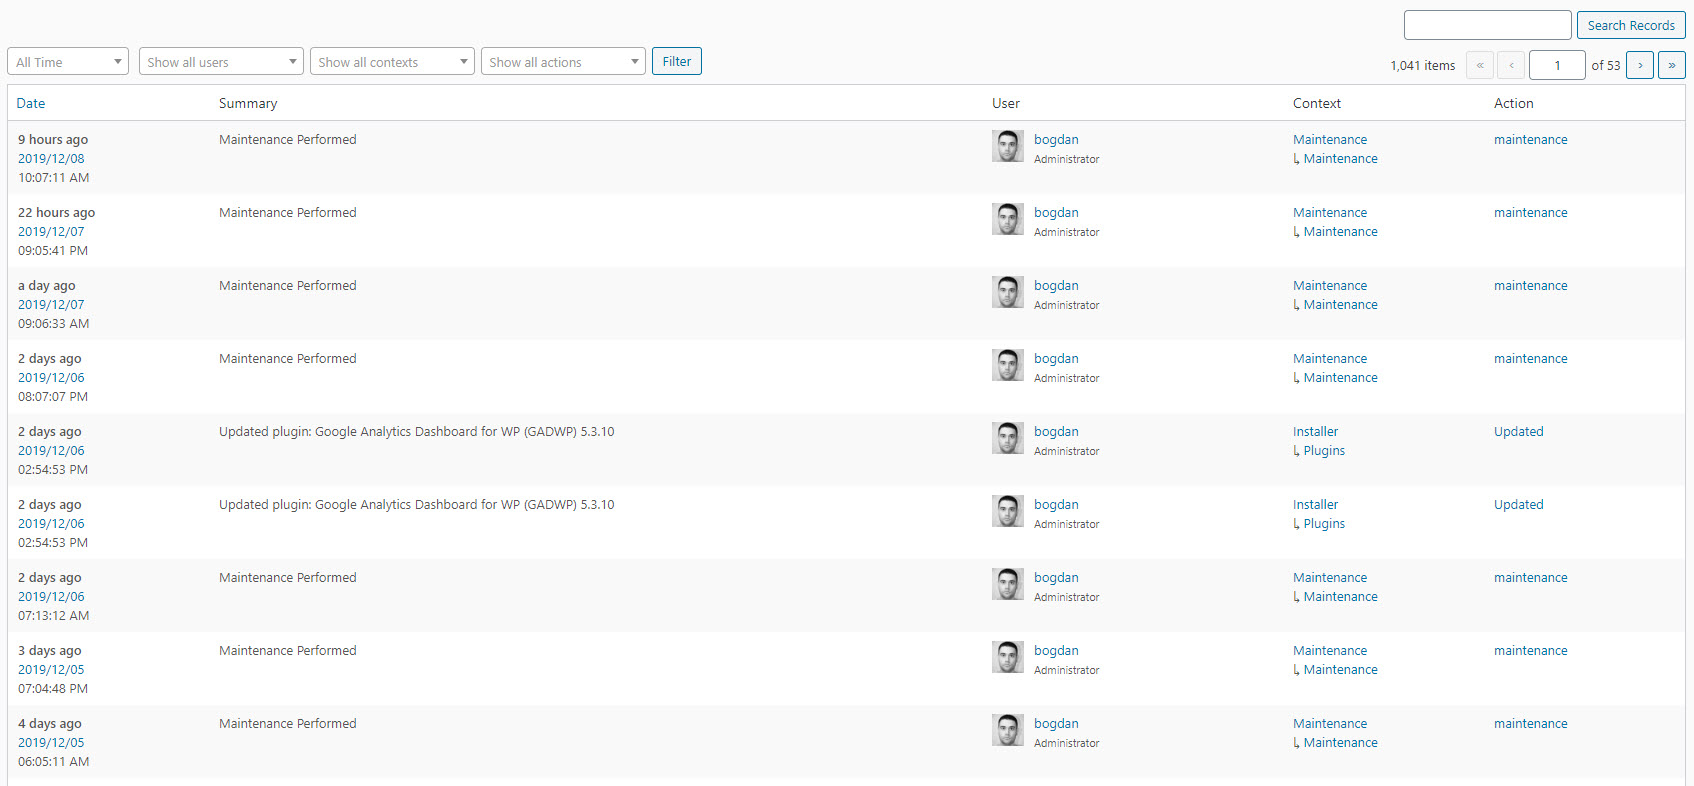
Child Reports Records
If you want to see what has been recorded by the MainWP Child Reports plugin,
- Go to your child site.
- Go to the WP Admin > Settings > MainWP Child > MainWP Child Reports page
MainWP Child Reports Settings
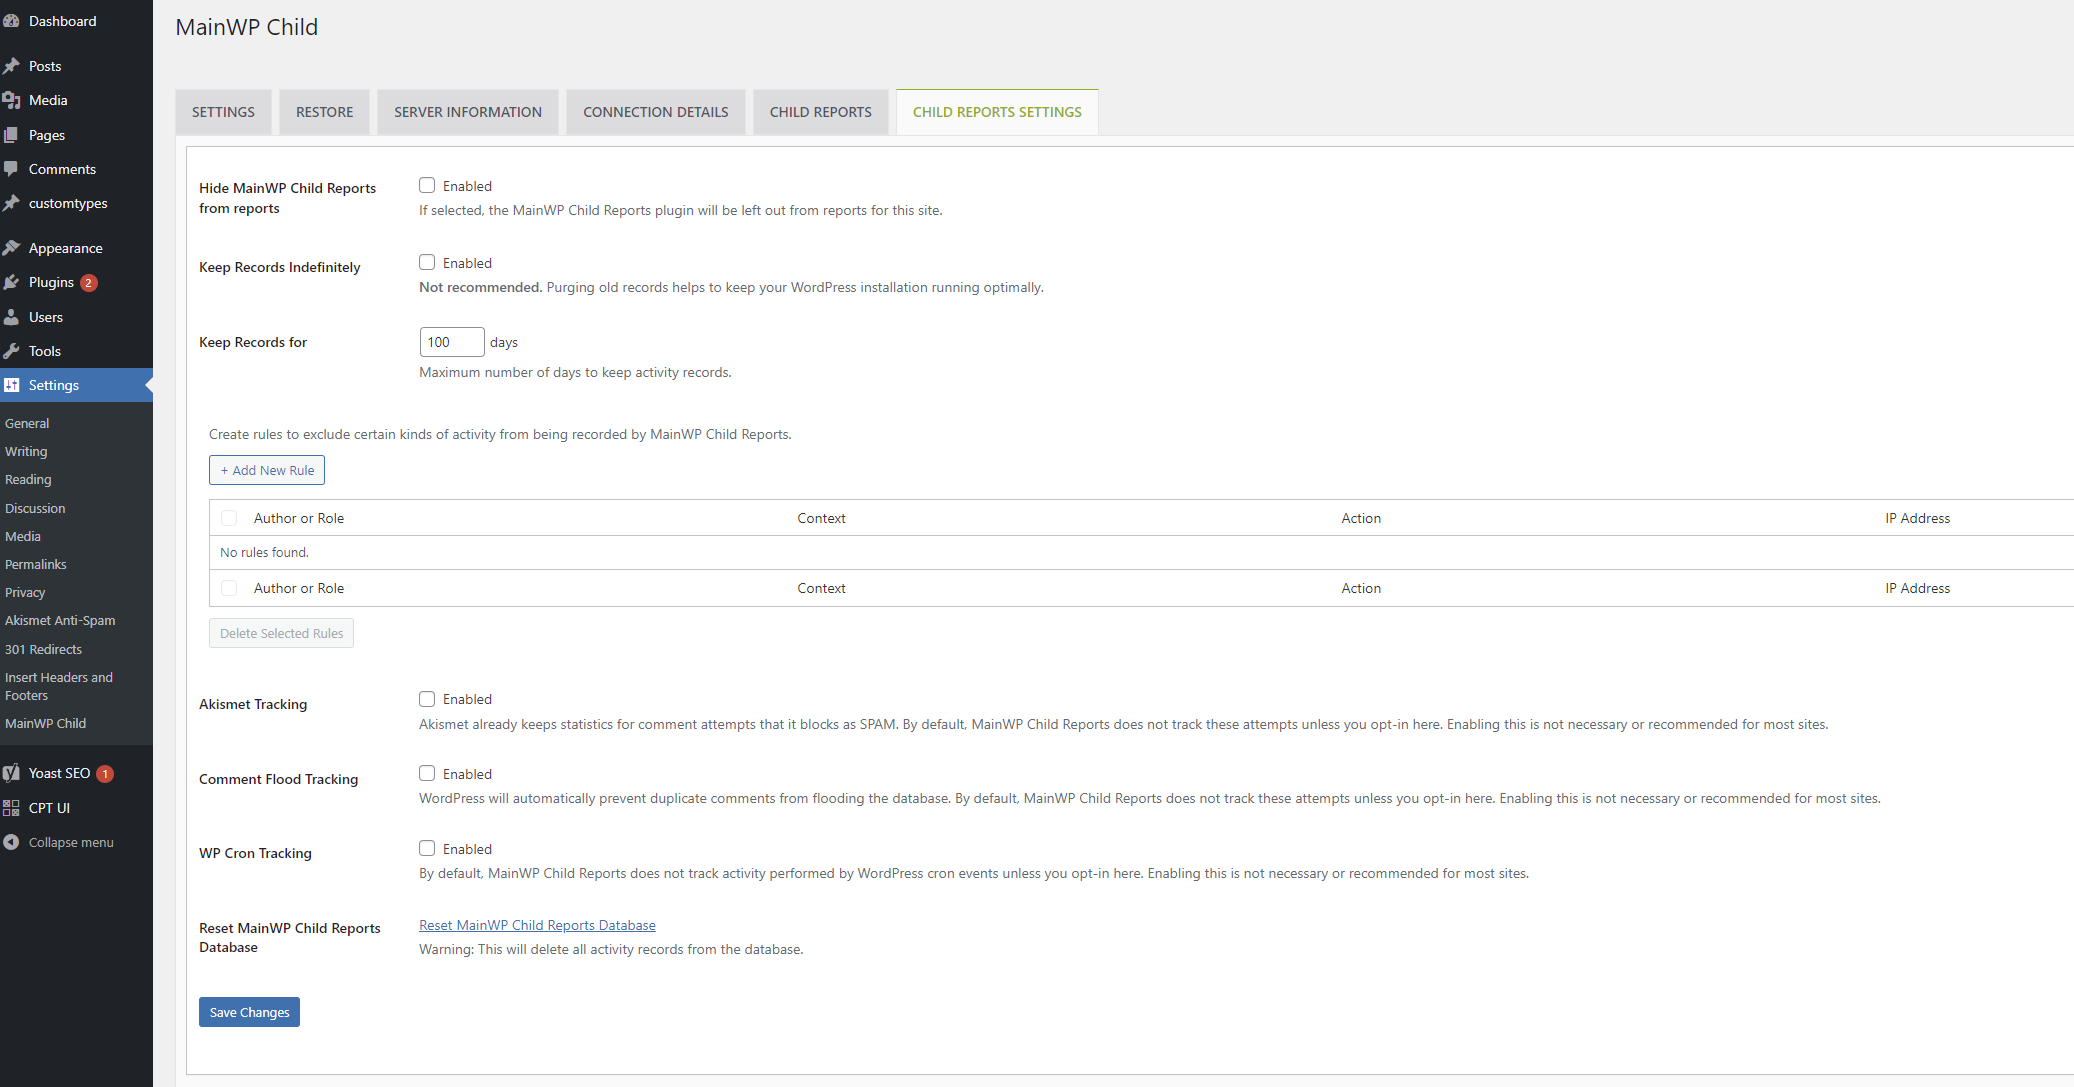
The settings page can be found on the WP Admin > Settings > MainWP Child > MainWP Child Reports Settings page.
- Hide MainWP Child Reports from reports – If selected, the MainWP Child Reports plugin will be left out from reports for this site.
- Keep Records Indefinitely (Not recommended) – Purging old records helps keep your WordPress installation running optimally.
- Keep Records for – The Maximum number of days to keep activity records. The default value is 100 days.
- Akismet Tracking – Akismet already keeps statistics for comment attempts that it blocks as SPAM. By default, MainWP Child Reports does not track these attempts unless you opt-in here. Enabling this is not necessary or recommended for most sites.
- Comment Flood Tracking – WordPress will automatically prevent duplicate comments from flooding the database. By default, MainWP Child Reports does not track these attempts unless you opt-in here. Enabling this is not necessary or recommended for most sites.
- WP-Cron Tracking – By default, MainWP Child Reports does not track activity performed by WordPress cron events unless you opt-in here. Enabling this is not necessary or recommended for most sites.
- Reset MainWP Child Reports Database – Use this option to delete all activity reports from the database.
Create Custom Report Templates
Introduction
The Pro Reports Extension uses PHP templates that allow you to design and create professional reports with the information you want to show to your clients.
The Pro Reports Extension also allows you to add custom content, including contact info, images, additional text, or any other content you want to include in your report.
Creating a custom report consists of two steps. The first step is to create the actual PHP file representing the template, and the second is to edit and customize that PHP file.
Customizing the template by adding or removing Pro Reports Tokens should be easy and straightforward for most readers. However, advanced customization of the report requires some knowledge of HTML.
Creating a PHP file for the Custom report
- Download the MainWP Pro Reports Extension from your MainWP Account
- Extract the plugin files to your computer
- Locate one of the default PHP templates in the /mainwp-pro-reports-extension/templates/reports/ directory
- Copy a PHP file, rename the file to a new desired title, and use your favorite code editor to make customizations (see the following chapter for instructions on customization)
- Once you are finished with the customization and the template is ready, upload the PHP file the /wp-content/uploads/mainwp/report-templates/ directory on your Dashboard site
- Once uploaded, the template will be available in the Report template dropdown
How to Use Tokens
Tokens offer an easy way to customize your Pro Report. They can be added directly to the PHP file of your custom report or in the existing Reports through the visual editor on MainWP Dashboard.
The MainWP Client Reports extension uses three different types of tokens:
- Client Tokens
- Section Tokens
- Data Tokens
A list of all available tokens for the Pro Reports extension is available here: https://kb.mainwp.com/docs/available-pro-reports-tokens/
Client Tokens
These tokens will allow you to display data you have set in the Edit tab of the Individual Child site overview. If you plan to use one of the Client tokens in a report for a certain Child site, a value for it must be set.

For example, by setting the value for [client.email], that token can be used in the Send email to field in order to send a report for multiple websites and multiple clients.

You can easily see available Client Tokens and insert them into a field by clicking on the Insert tokens link.

Section Tokens
Section tokens require both opening and closing tags. They can easily be recognized by the starting part section.
For example, [section.plugins.installed] is an Opening tag and [/section.plugins.installed] is a Closing tag for that Section token.
Section token loops through the database and searches for the relevant data during the selected date range.
Example: [section.plugins.installed]
The following code would loop through all selected Child sites and, within the selected Date range, list all instances of plugin installations.
[section.plugins.installed]
[plugin.name]
[plugin.installed.date]
[/section.plugins.installed]

Data Tokens
Data tokens have only one tag; they have to be used inside section tokens and have to be added between an opening and closing tag of a section token.
From the example above for the Section Tokens, the [plugin.name] and [plugin.installed.date] are Data Tokens.
[section.plugins.installed]
[plugin.name]
[plugin.installed.date]
[/section.plugins.installed]
In our help article, you can find all available Data Tokens and the respective Section tokens into which they can be inserted.

Counter Tokens
Counter Tokens are a special type of Data tokens.
You will be able to recognize these tokens by the first word. They end with “.count.” For example [plugin.installed.count]
These tokens won’t work inside of the section tokens. You need to use them outside of section tokens.
Example: [plugin.installed.count]
The counter token will display the number of Installed Plugins, but it must be placed outside of the opening and closing tag of the section token.
[section.plugins.installed]
[plugin.name]
[plugin.installed.date]
[/section.plugins.installed]

Total number of plugin installations: [plugin.installed.count]

Delete Reports
To delete reports,

- Go to the MainWP > Extensions > Pro Reports > Reports page
- Locate the report that you want to delete
- Click on the Actions Menu
- Click the Delete action
- Confirm deletion
Duplicate Reports
To duplicate reports,

- Go to the MainWP > Extensions > Pro Reports > Reports page
- Locate the report that you want to Duplicate
- Click on the Actions Menu
- Click the Duplicate action
- Enter a new Report Title
- Enter the Send To and Send From fields
- Click the Save Draft button
Storage of the PDF files
The PDFs generated by Pro Reports are saved only on the Dashboard site, in the /wp-content/uploads/mainwp_pro_reports/ directory.
Pro Reports REST API
All MainWP REST API calls, including full documentation, and examples, are now publicly available on Postman.
Please refer to our REST API document for more details on enabling REST API and managing Keys: https://kb.mainwp.com/docs/mainwp-rest-api/