Starting from version 4.1, you have full control over the email notifications that your MainWP Dashboard plugin sends. The whole new UI will provide you an easy way to Enable/Disable email notifications, manage recipients, and even create a completely new email template. It is important to say that all email settings are manageable globally and on a per-site basis. This means that your MainWP Dashboard can send all emails to you as an administrator and, if needed, individual emails to your clients that will contain info only for the website owned by the client.
Manage Email Settings
To manage email settings,
- Login to your MainWP Dashboard
- Go to the MainWP > Settings > Email Settings page
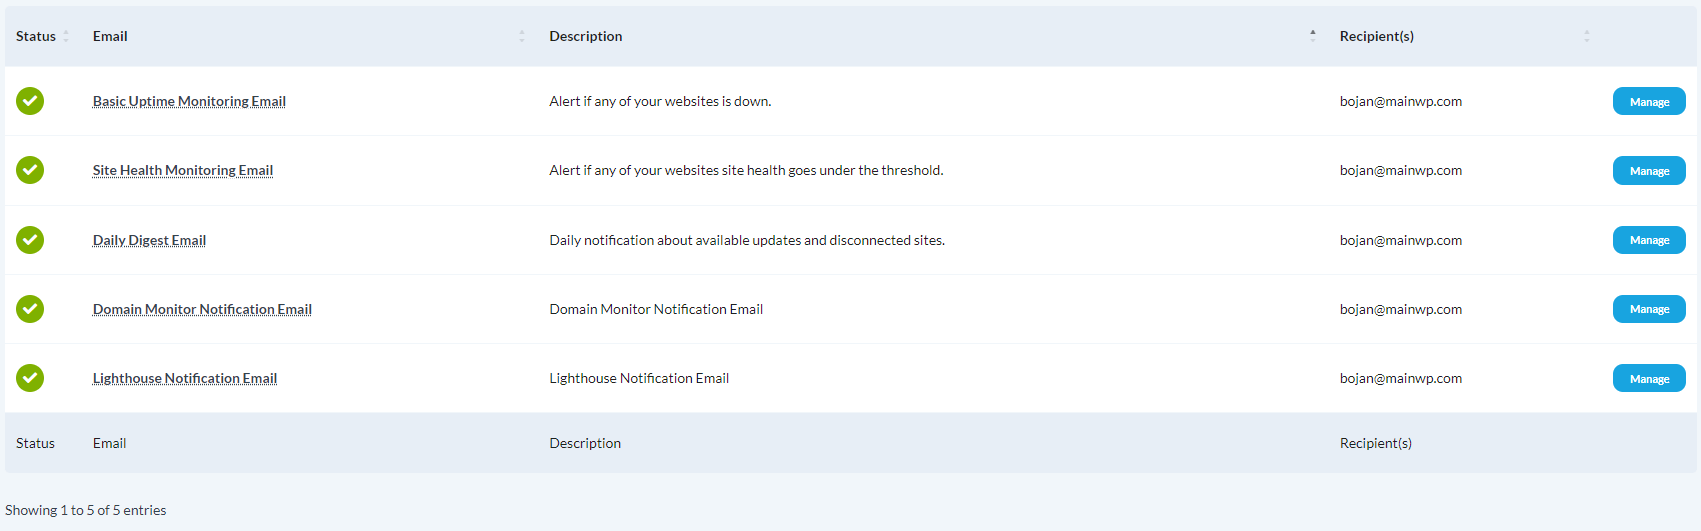
- Locate the specific email notification that you want to edit
- Click the Manage button
- The whole new settings form will show where you can edit the following:
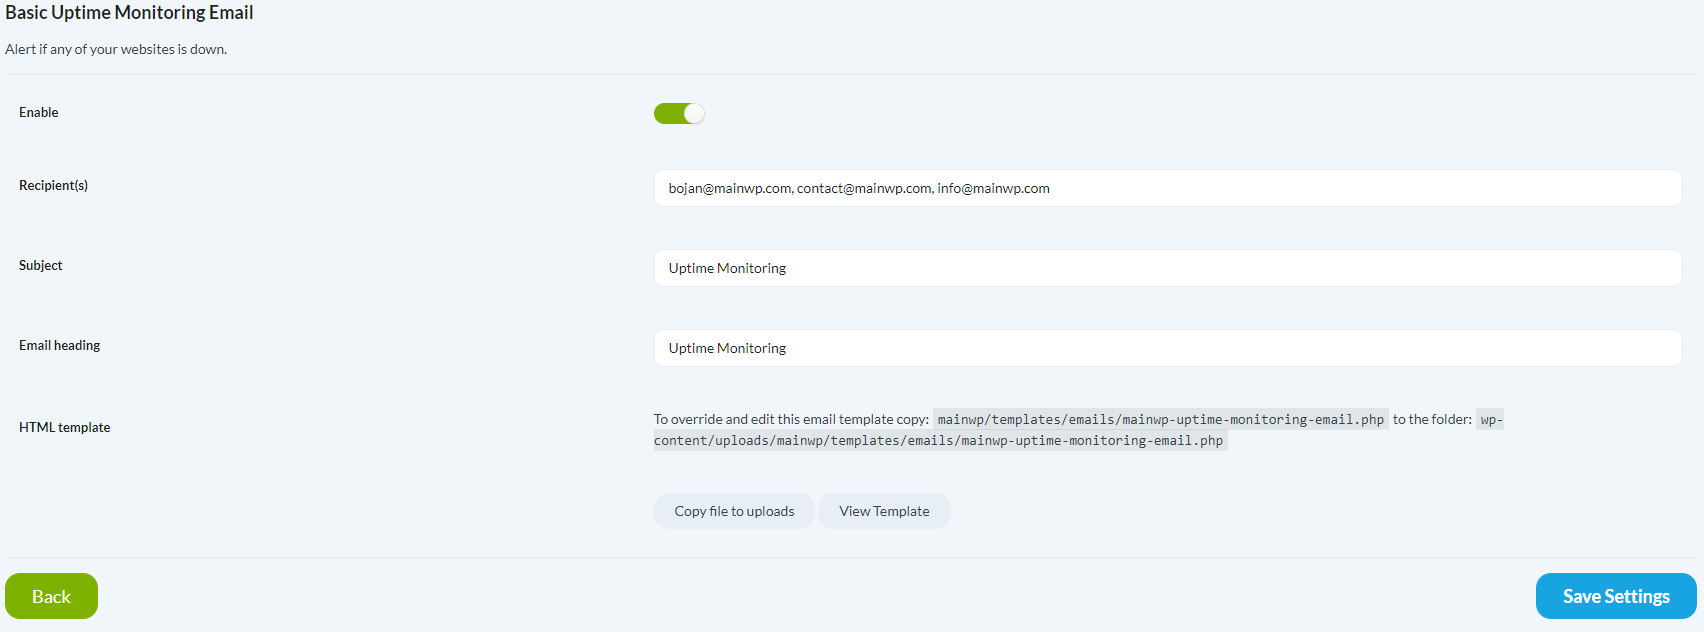
- Enable/Disable the email notification
- Add/Remove recipients. Note that you can add multiple email addresses by separating them with a comma—for example, email1@email.com,email2.email.com,email3@email.com.
- Set custom Email Subject
- Set custom Email heading (email content heading).
- Manage the Email HTML Template.
- To view the template that is in use, click the View Template button
- Use the Copy file to uploads button to copy the default template to /wp-content/uploads/maiwnp/templates/emails/ directory so you can make customizations.
- Once a custom template is in use, you will be able to Edit it directly from this screen or Delete it.
All email notifications can be managed globally or per-site basis. This means that you can set individual recipients for individual sites, set individual Subject and Heading, or even Enable/Disable notifications for separate child sites.
If we take, for example, the Daily Digest Email, recipients set in the General Settings will get an email that will contain (Available Updates and Connection Status) data about all sites in the email. Still, recipients set in individual site email settings will get data only for this particular child site.
To manage individual site email settings,
- Login in to your MainWP Dashboard
- Go to the MainWP > Sites > Manage Sites page
- Locate the wanted child site
- Click the Edit in the Actions menu
- Go to the Email Settings tab
- Set your preferences and save settings.
Tokens Support
All email notifications support tokens. If you are using the Boilerplate extension or one of the Reporting extensions (Client Reports or Pro Reports), you can use all tokens provided by these extensions. In the case of Reporting extensions, you can use both Client tokens or Report tokens. If you use the Boilerplate extension, you can use the default and custom tokens.
Important Notes
Since all tokens are individual-site-based, they can be used only in individual site emails.
Report tokens that fetch information from the child site should be used carefully. With poor server configurations, loading data from child sites can cause timeouts and lead to sending email failure. By default, this is disabled, but if you want to use report tokens in your templates, tweak the following line at the top of the email template:
$child_site_tokens = false;
to:
$child_site_tokens = true;