Extensions using Classes in MainWP
Heads up: This page may include affiliate links. Read the full disclaimer.
MainWP has become an invaluable tool in my arsenal of weapons against compromised sites and people trying to compromise my clients. It helps me maintain and upgrade all of my client sites, as well as back them up on a daily basis. I store full server backups as well as individual site backups thanks to the set of tools I have available, and Amazon handles all of my backup needs, with MainWP as the facilitator. Without the remote backups extension, I can only imagine how expensive my server bill would be on a monthly basis – when adding 20GB a month to your VPS costs an additional $10, and Amazon costs about half of that to store ten times the amount of data. Over the past few months I’ve become pretty attached to my MainWP dashboard, which allows me to make sure everything is running smoothly. When the opportunity presented itself to write for the company, I jumped on it because I want it to be a valuable tool for other IT or Web professionals like myself that want to work smarter, not harder.
This post is part of a tutorial on creating your own MainWP Extension
1. How to create a basic WordPress plugin
2. Turning that basic plugin into an MainWP Extension
3. Passing Information to the Child site
4. Extensions using Classed in MainWP
5. Monetizing your new Extension
In the previous few posts I have covered how to create a basic WordPress plugin, connecting it to and turning that basic plugin into an extension inside of MainWP, then passing information to a child site in order to perform an action – in this case it was just to present a notice about an upcoming maintenance block. Now we want to clean it up a bit – the coding I used was very basic and for the purposes of this blog post we’re going to encapsulate it all into a class, which is simply defined as “a collection of variables and functions working with these variables”. A class lets us streamline the code, group similar tasks, represent data as objects, and is the first step to object oriented programming, which is ultimately a simpler way to program once you understand it. This post is going to be quite a bit more difficult to understand, as we’re taking the leap from elementary coding to intermediate coding in one bound, with most of the work already being completed.
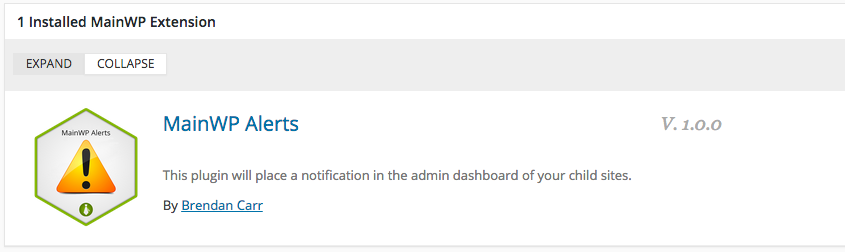
What I’ve done is take the example class-based extension and moved all of the existing code from the previous post into the class-based system. What we’ll do moving forward is use the file and folder structure of a MainWP extension, the class-based structure also, and style the logo while we’re at it. I’ve created an icon for the purposes of this, and renamed the extension to “MainWP Alerts”, so with a little tweaking it will show this:
So to start off with, instead of a block of code, I’ve got a download for you, which contains all of the normal structure of a MainWP extension, and all of the code from our last post ported over: download the extension.
Lets look a little bit at the header and what has changed – for starters, there’s a new line for Icon URI:
<?php
/**
 * Plugin Name: MainWP Alerts
 * Plugin URI: https://www.brendancarr.ca
 * Description: This plugin will place a notification in the admin dashboard of your child sites.
 * Version: 1.0.0
 * Author: Brendan Carr
 * Author URI: https://www.brendancarr.ca
 * License: GPL2
 * Icon URI: https://mainwp.com/wp-content/uploads/2015/08/mainwp-alerts-icon.png
*/
The Icon URI is used by a few different plugins, but for MainWP it changes the look of the plugin in the dashboard.
Next, instead of having individual functions standing by themselves, we have a class called MainWPExampleExtensionActivator, which within it has a function called __construct() – this consolidates all of the plugin and extension activation functions inside of WordPress into a single class. Find out more about __construct at this link: https://ebckurera.wordpress.com/2013/03/18/__construct-in-php-oop-with-php/. The other class is the extension itself, broken down into (again) __construct, two init functions, and the renderPage function which will display the settings page we created earlier.
class MainWPExampleExtensionActivator
{
    protected $mainwpMainActivated = false;
    protected $childEnabled = false;
    protected $childKey = false;
    protected $childFile;
    public function __construct()
    {
        $this->childFile = __FILE__;
        add_filter('mainwp-getextensions', array(&$this, 'get_this_extension'));

        // This filter will return true if the main plugin is activated
        $this->mainwpMainActivated = apply_filters('mainwp-activated-check', false);
        if ($this->mainwpMainActivated !== false)
        {
            $this->activate_this_plugin();
        }
        else
        {
            //Because sometimes our main plugin is activated after the extension plugin is activated we also have a second step,
            //listening to the 'mainwp-activated' action. This action is triggered by MainWP after initialisation.
            add_action('mainwp-activated', array(&$this, 'activate_this_plugin'));
        }
        add_action('admin_init', array(&$this, 'admin_init'));
        add_action('admin_notices', array(&$this, 'mainwp_error_notice'));
    }
Inside the construct__ function you’ll notice that there is again a filter to check if mainwp is activated, and if so it calls the function activate_this_plugin. Notice how it’s called though – $this refers to the class that was instantiated at the very bottom of the code (think of it like a way to kickstart the whole plugin in a single line), and you call functions inside the class using ->function_name();
Now, the register_activation_hook is still there outside of the class(es), which is tied to WordPress, and basically makes sure MainWP knows that when you activate the plugin, that it will also activate the extension.
register_activation_hook(__FILE__, 'mainwp_example_extension_activate');
function mainwp_example_extension_activate()
{
    update_option('mainwp_example_extension_activated', 'yes');
}
The function for settings that was originally on its own also is now inside of the class, and calls the class MainWPExampleExtension, then runs the function renderPage – which will handle all of the tasks that the original plugin did.
        if ($this->childEnabled)
        {
            $this->mainwp_extension_autoload('MainWPExampleExtension');
            MainWPExampleExtension::renderPage();
        }
        else
        {
            ?><div class="mainwp_info-box-yellow"><?php _e("The Extension has to be enabled to change the settings."); ?></div><?php
        }
I have a separate function called mainwp_extension_autoload in here, this just lets us separate classes into files inside the /class folder, and load them using this simple function.
Once we call the renderPage() function, it does everything exactly the same way as the old code does, just with a few minor tweaks – one of them being that I took the get_childkey function and moved it within the class, so in order to actually retrieve the key, we call it using the class, then a double-colon scope resolution operator. Why do we use a double colon instead of an arrow? Because we don’t have the object instantiated as a variable; ie: we haven’t done something like $x = new className. A brief synopsis on operators can be found here: https://stackoverflow.com/questions/3173501/whats-the-difference-between-double-colon-and-arrow-in-php
Now to the code! It looks very similar, it’s just a function inside a class, with the same features as before. Try it out, download the extension zip file and see what you think. You can update the logo quite easily, and add Javascript and CSS to your new extension, and basically edit everything inside of renderPage() to change what your new extension does.
    public function renderPage() {
        global $mainWPExampleExtensionActivator;

		$textvar = get_option('test_plugin_variable', 'Try not to panic! We have regularly scheduled updates this weekend.'); // this retrieves the text in the box we just saved.

		$adminnotice="

		function my_admin_notice(){
			echo '<div class="updated"><p>".$textvar."</p></div>';
		}
		add_action('admin_notices', 'my_admin_notice');

		"; // creates the function we need on the child site, including the text variable.

		if (isset($_POST['change-clicked'])) { // this is where the magic happens - when we hit the button, it executes on the child sites.
			if (count($_POST['selected_sites'] > 0)) { //makes sure a child site has been selected

				update_option( 'test_plugin_variable', $_POST['adminnotice'] );
				$textvar = get_option('test_plugin_variable', 'Try not to panic! We have regularly scheduled updates this weekend.');

				echo '<div class="updated">';
				//print_r($_POST);

			    $childKey = MainWPExampleExtension::get_childkey();

		        $post_data1 = array( // this saves the snippet to the database, where the Child plugin can execute it.
		            'action' => 'save_snippet',
		            'type' => 'B',
		            'slug' => 'adminnotice',
		            'code' => $adminnotice,

		        );

		        $post_data2 = array( //this removes the snippet after we're done with it, based on the checkbox in the form.
		            'action' => 'delete_snippet',
		            'type' => 'B',
		            'slug' => 'adminnotice',
		            'code' => $adminnotice,

		        );

			     $sites = $_POST['selected_sites'];
			     foreach ($sites as $site) {
				     $websiteId = $site;
				     if (isset($_POST['remove-clicked'])) {
					    $information = apply_filters('mainwp_fetchurlauthed', __FILE__, $childKey, $websiteId, 'code_snippet', $post_data2);
					    echo "<p>The notice has been removed from your child site!</p>";
				     } else {
				     	//echo "<br>Executing on Child site ID#".$websiteId.":<br>";
					 	$information = apply_filters('mainwp_fetchurlauthed', __FILE__, $childKey, $websiteId, 'code_snippet', $post_data1);
					 	//print_r($information); // this is the return information from after we execute the code.
					 	if ($information['status'] == "SUCCESS") {echo "<p>The notice has been posted to your child site!</p>";}
				     }

			     }

				 echo "</div>";
			 }
		} //if the form was submitted
			?>
		    <div class="wrap">
		      <h1>Admin Notice</h1>
		      <p>This simple plugin will set and ouput an admin notice to the dashboard of the child sites you select. Change the text below:</p>
		      <form action="<?php echo str_replace('%7E', '~', $_SERVER['REQUEST_URI']); ?>" method="post">
			    Admin Notice:<input type="text" value="<?php echo $textvar; ?>" name="adminnotice" id="adminnotice" placeholder="hello world"><br />
			    <input name="change-clicked" type="hidden" value="1" />
			    Remove Notice: <input name="remove-clicked" type="checkbox" /><br />
		        <input type="submit" id="postbutton" value="Post Notice" />
		        <div id="uploader_select_sites_box" class="mainwp_config_box_right">
		        	<?php do_action('mainwp_select_sites_box', __("Select Sites", 'mainwp'), 'checkbox', true, true, 'mainwp_select_sites_box_right', "", array(), array()); ?>
		    	</div>
		      </form>
		    </div>
			<?php

    }
Share
Manage Unlimited WordPress Sites from One Dashboard!
- Privacy-first, Open Source, Self-hosted
- Easy Client Management
- 15+ & 30 + Premium Add-ons
- Bulk Plugins & Themes Management
1 comment
William Patton
There is a typo on this page in the link block near the start. It says:
`Extensions using Classed in MainWP`
But instead it should be:
`Extensions using Classes in MainWP`
Comments are closed.