How to enable Varnish on a Cloudways Hosted Child Site for WooCommerce
Heads up: This page may include affiliate links. Read the full disclaimer.

Varnish is a fast server-side web application accelerator. A number of Managed WordPress and other hosts already have Varnish installed and make it easy to enable on your child sites. In this example, we are going to show how easy it is using Cloudways for enabling Varnish on your child site (which is using WooCommerce), then for setting the correct rules for Varnish all through an easy-to-use UI.
First, login to Cloudways and then select the server which your child site is running on.
Apps > Application Settings > General Settings
By default, Varnish will not be enabled and you can toggle to enable Varnish for your child site.

Now that Varnish is enabled for your child site, you will need to add the correct rules for WooCommerce and WordPress into the settings. You can do this using the UI in the Cloudways manager.
Apps > Application Settings > Varnish Settings
![]()
You will need to add a number of rules to have Varnish work correctly with WooCommerce and WordPress.
After you have added all the correct rules in Varnish, it will look like this:

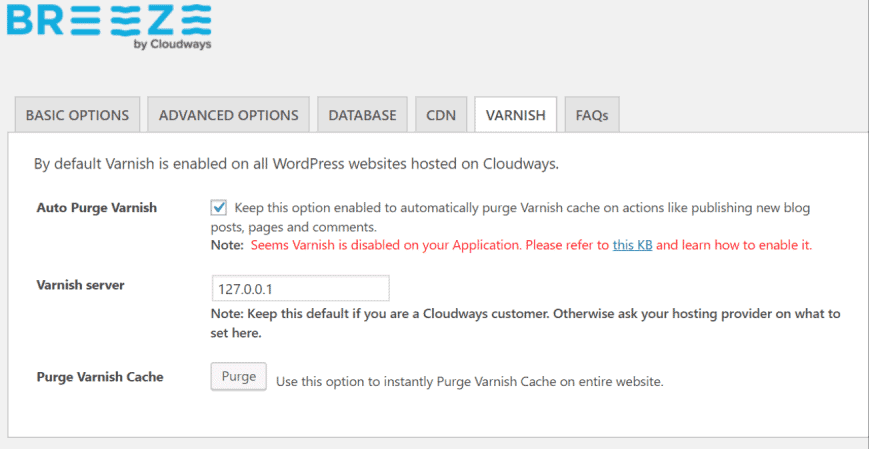
Breeze is a free caching plugin from Cloudways, which includes support for Varnish, so that your Varnish cache will be automatically purged when any changes happen on the site. You can follow this guide in help on setting up Breeze plugin on your child site.
Varnish will improve your child site’s performance, as well as not cause any issues with caching any pages which do not need to cached like cart, checkout, and my account. Excluding those pages from being cached as well as pages that set any related WooCommerce and WordPress related cookies will prevent any possible caching issues with your store.
Share
Manage Unlimited WordPress Sites from One Dashboard!
- Privacy-first, Open Source, Self-hosted
- Easy Client Management
- 15+ & 30 + Premium Add-ons
- Bulk Plugins & Themes Management