Todd Jones
Along with being the resident writer for MainWP and content hacker at Copyflight, I specialize in writing about startups, entrepreneurs, social media, WordPress and inbound marketing topics.

Earlier this month, someone in the MainWP Users Facebook Group created a post asking to see member’s MainWP dashboard.
Several shared how they made changes to the look of their MainWP dashboard, and I wondered if this was something I could do. Turns out, yes, I could do it.
So, I pestered … pinged Keith Crain to give me the lowdown real quick.
Keith did a good job helping me discern what I needed to use, the MainWP Custom Dashboard Extension.
The extension is included with Pro.
Note: The Custom Dashboard Extension is different from the MinWP Code Snippets Extension.
There are essentially two ways to make simple custom changes to your dashboard. The first is using the Custom Dashboard Extension, and the second is Joshua Vandercar‘s Typemarker plugin.
Typemarker is meant to help users customize their reports for MainWP. However, it has a section to customize your MainWP Dashboard.
Therefore, if you already have the Typemarker plugin or were planning to use Typemarker, you may find this an easy way to customize your dashboard.
Now, for my purposes, I really didn’t want to do much. First, I just wanted to try it out. Second, initially, the only changes I wanted to make were to change the color and the logo.
It turns out, there are premade snippets for that—more on that in a bit.
Now, the brilliant part of all this is that you can literally change your dashboard how you want. The limits are only as much as your imagination, and your skills can take you.
For example, after I started making little changes, I realized I would like a better way to find my Extensions. I often don’t use them, but they always seem buried in the Navigation bar when I need them.
So, if you have some CSS chops and, perhaps, some PHP skills, you could literally create your dashboard how you want.
Bookmarked Links:
My first course of action was to change the green on the left-hand sidebar. This section is called the navigation.
Make sure you have the MainWP Custom Dashboard Extension installed in your MainWP Dashboard.
You will want to bookmark the MainWP Github page for custom dashboard extensions.
You can find that here:
https://github.com/mainwp/mainwp-custom-dashboard-extension-examples
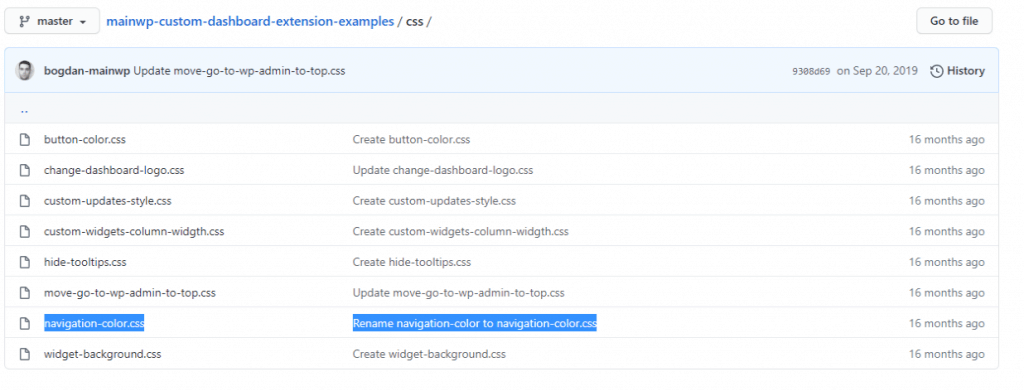
You will need the CSS snippets to make the change to your navigation color, and that can be found here:
https://github.com/mainwp/mainwp-custom-dashboard-extension-examples/tree/master/css/
Choose the “navigation-color.css” snippet. There, all you need to do is copy and paste the snippet into your MainWP Custom Dashboard Extension.
Next, you will want to locate the CSS for the navigation background. That Is about the third line of code. There, change the color to your brand’s color. If you change the color to a darker color, as I did, you will want to change the font’s color to something lighter (i.e., white).
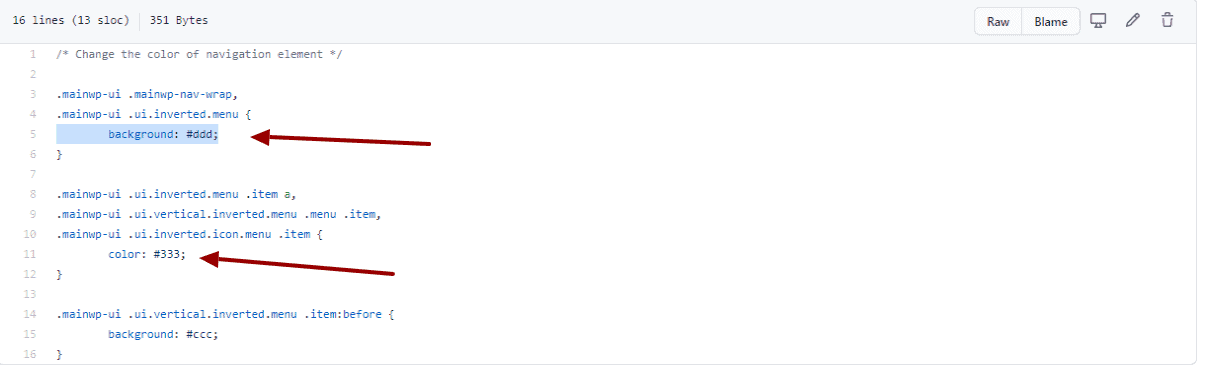
That can be found in the next section of the code. I changed mine to white, which showed up really nice.
Next, click the “Save Changes” button in the bottom right-hand corner. Once your browser refreshes, you will see your new background color for the navigation.
Now, I’m sure you don’t want to stare at the MainWP logo now that you have changed your Navigation background. Maybe you have a team member who updates your sites for you. You may have a myriad of reasons for changing out the logo.
Let’s get started, shall we?
The first thing to do is to make sure you have the right size of your company logo.
Keith recommended I do a check in the Chrome Inspector to find out the logo’s size.
The logo is approximately 166 px wide in my MainWP dashboard.
I opened up my GIMP and made a quick adjustment.
Then I went into the WordPress dashboard to add my Media Library logo.
Once I had it in the Media Library, I copied the URL location of the logo file.
Make sure you put that in your notepad or somewhere because you will need it.
Next, go back to the Snippets page on GitHub and choose “change-dashboard-logo.css.”
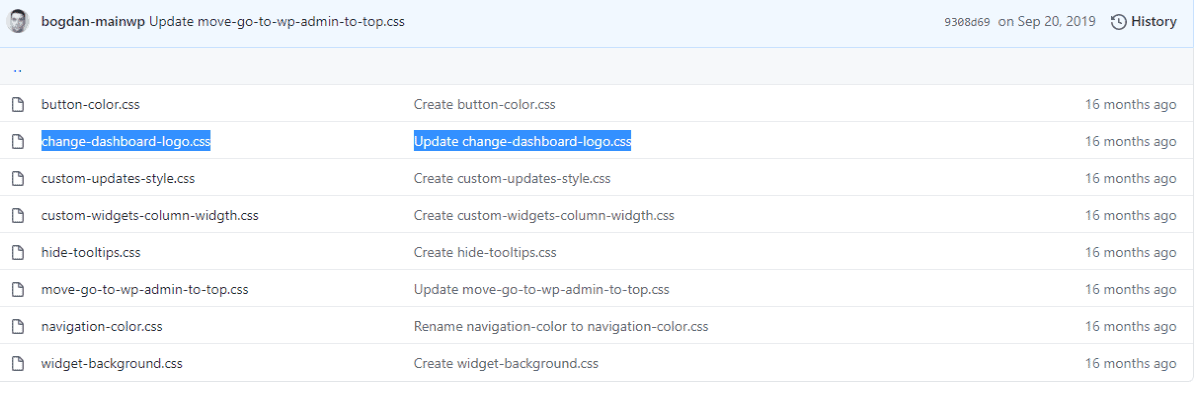
From there, you will see about 22 lines of code. Copy the code and paste it into your MainWP Custom Dashboard Snippets page.
On the 20th line, you will see:
background-image: url(‘PATH/TO/YOUR/LOGO’)!important;
This is where you will put your logo. Copy the file path and put it in the parenthesis.
Once you have completed this step, click the “Save Changes” button in the bottom right-hand corner of the page.
The MainWP team has 8 CSS snippets you can use to make changes, including the button color (if you don’t like that green), update styles, column widths, hiding tooltips, and moving your go WP Admin to the top, and widget backgrounds.
Again, the potential is as limited as your own skills and imagination.
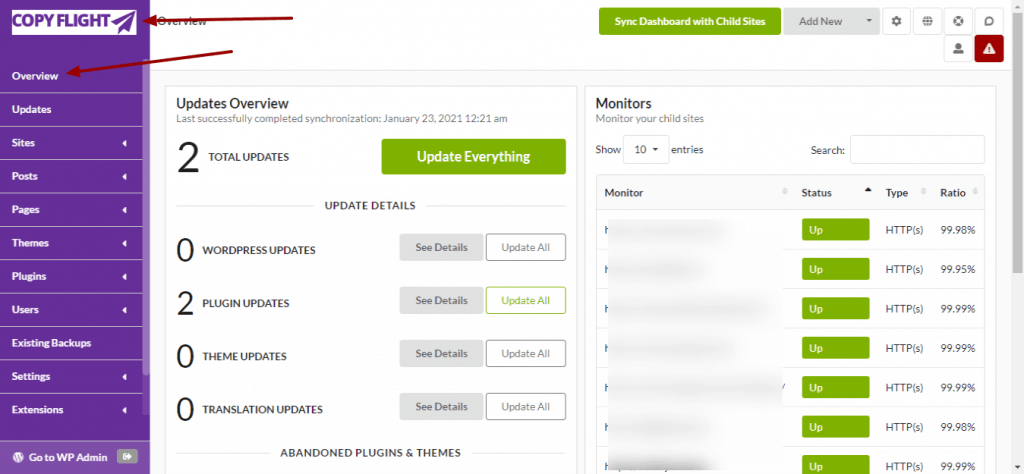
If you followed my instructions above, you should now have new color navigation, and your logo should have replaced the MainWP logo at the top.
Now, I am not a top-notch Front End Developer. On the contrary, I am a novice. I remember hacking Genesis Themes to create custom layouts for an agency where I worked. It took me a while, but I learned a lot.
If I can do this, anyone who uses MainWP can do this.
Show us your dashboards in the MainWP Users Facebook Group.
Manage Unlimited WordPress Sites from One Dashboard!