Todd Jones
Along with being the resident writer for MainWP and content hacker at Copyflight, I specialize in writing about startups, entrepreneurs, social media, WordPress and inbound marketing topics.

Congratulations on launching your WordPress site care business. Not only have you been successful, but you have grown your business and added members to your team. You are now ready to add some of your new team members to the mix of managing your client’s websites.
You need to customize user roles for the members of your WordPress care business. There is a way to do that and today I am going to show you how using the MainWP Team Control Extension.
This article presupposes that you already have a MainWP Dashboard, purchased the Team Control Extension or have a MainWP membership which allows you access to all the extensions.
Today we are going to look at four steps to take advantage of the MainWP Team Control Extension.
If you haven’t installed an extension or need help, you can learn how to install a MainWP extension here.
Who on your team will log in to your Site Care dashboard? If they do not already have an account, you will need to create one for them.
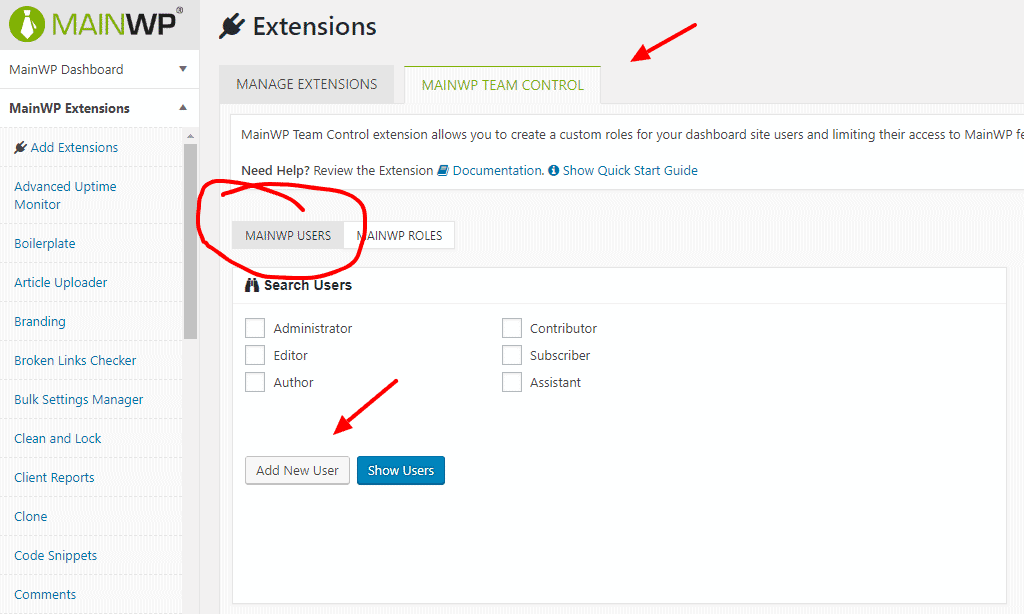
There are two ways to create a use for your MainWP dashboard. The first way is to use the traditional way by clicking Users in the WordPress Admin sidebar. The other way is to use the MainWP interface.
While in the MainWP Team Control user interface with the MainWP Users tab active, click on the button “Add New User.” From there you will be redirected to the WP Admin “Add User” page. From there, you enter the info to create a new user.
Once you have created their account, you will need to set their roles and permissions for working your client websites. Here is the key. The internal system for WordPress assigns roles based on a publishing platform.
No problem. We are going to bypass the internal system with the Team Control extension. The extension includes the ability to assign a new custom role.
In the MainWP Team Control tab, make sure to highlight MainWP Roles tab. From there the user interface will give you options to create your new roles. Click “Edit” for the role to assign permissions.

That will allow you to set permissions.
To assign a role to your user, highlight the tab for MainWP Users. From there, click the blue “Show User” button. From there you will get a list of your users. Click the box by the user’s name and use the “Change Role to” at the top to change the role to one of the custom Team Control roles.
That’s it. From here, your team members can accomplish their assigned roles. This way you can keep some of the more sensitive and advanced features of your businesses in the hands of your more experienced team members while junior members of your team can accomplish other less complicated tasks.
What kind of roles do you have assigned to your team members? Drop them in the comments below.
Manage Unlimited WordPress Sites from One Dashboard!